Electronic Data Access (EDA) - Web Based Training
 

EDA Dashboard

The EDA Dashboard will give the user access to their saved Bookmarks and Saved Searches.

An image of the Dashbaord screen.


Saved Searches

The user has the option to save search criteria and add it to their Dashboard for easy accessibility. This will save the criteria and the user can access the shortcut to these search results from their Dashboard. When selecting the saved search from the Dashboard the user will be brought to an updated view of the search results.

1. The user will enter in search criteria. In this example the user entered in a date range.
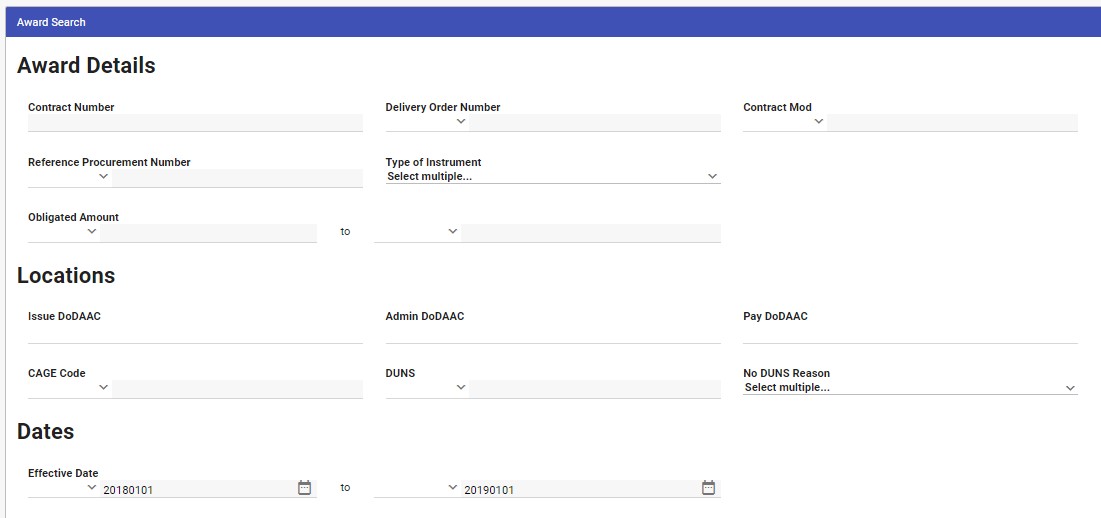
An image of the Save Search screen.


2. The results are returned, and the Save Search button will appear.
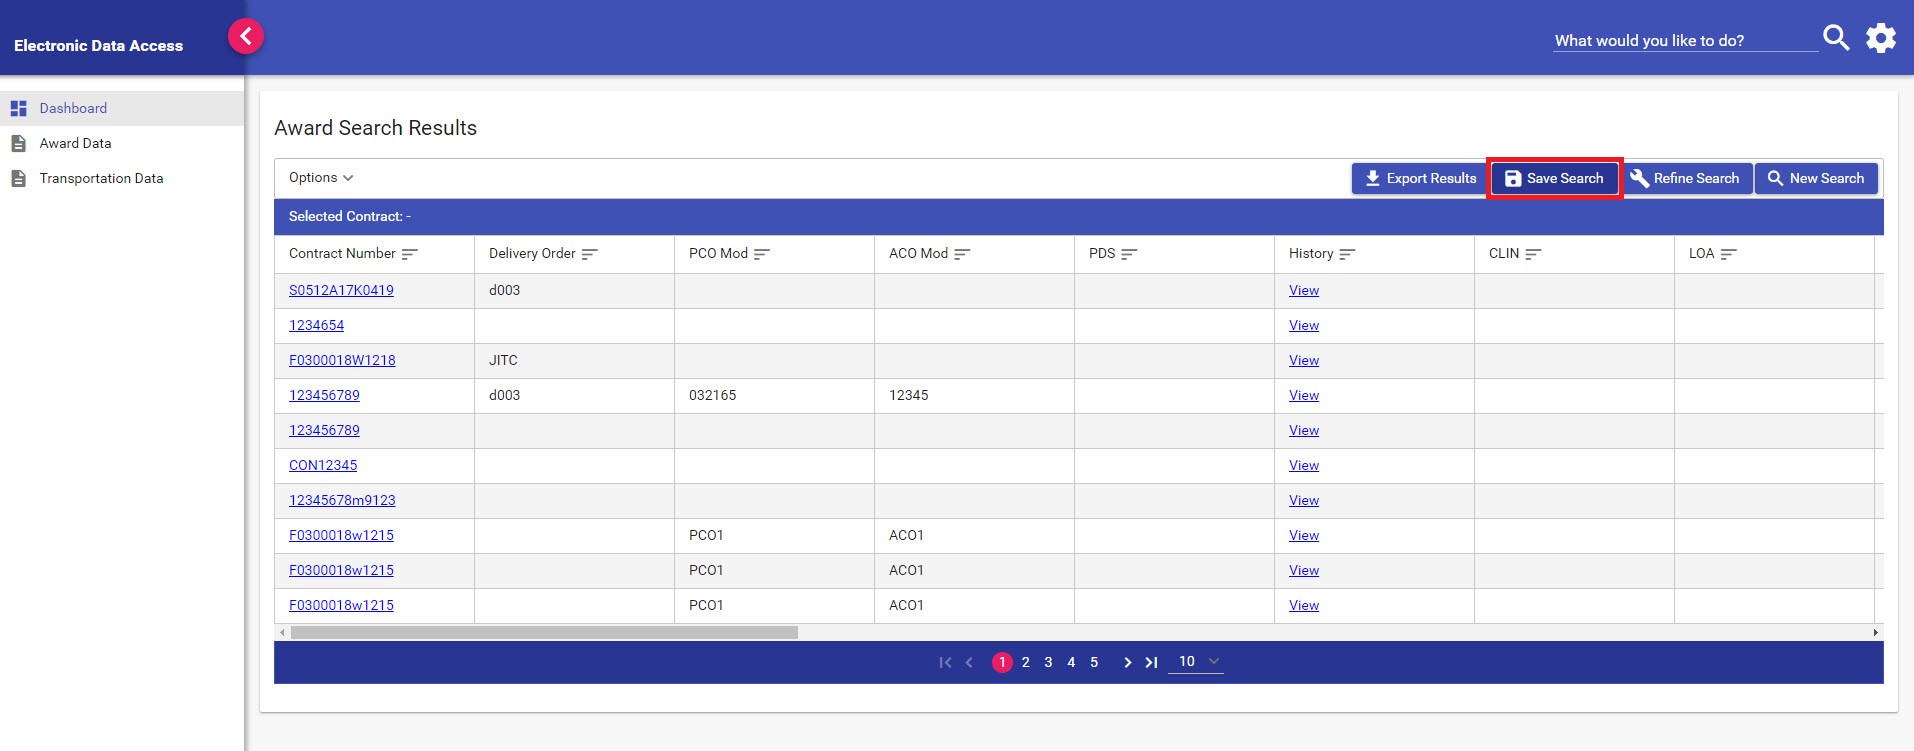
An image of the Save Search screen.


3. The user will enter a name for this Saved Search.
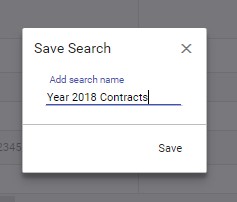
An image of the Save Search screen.


4. The user can access the Saved Search from their Dashboard.
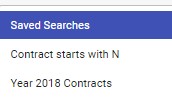
An image of the Save Search screen.


5. The user can also navigate to Settings to manage their Dashboard. The user will have the ability to delete Bookmarks or Saved Searches from their Dashboard.
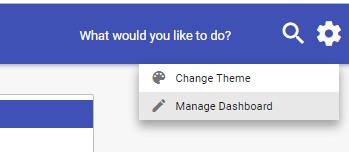
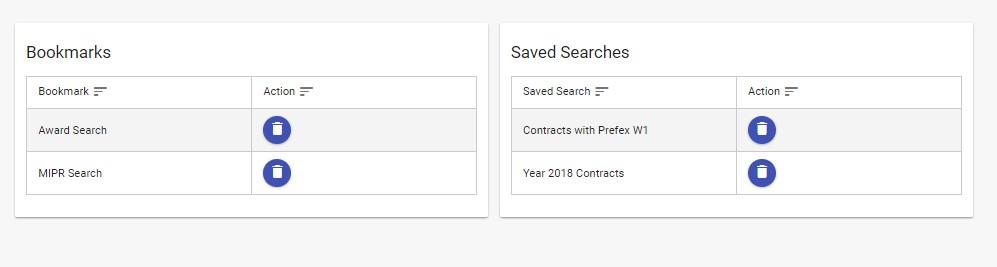
An image of the Bookmark screen.


An image of the Bookmark screen.


An image of the Bookmark screen.


Bookmarks

The user has the option to Bookmark searches or reports and add it to their Dashboard for easy accessibility.

1. When the user navigates to a search or report the Bookmark button will appear. This gives the user the option to Bookmark the search or report to their Dashboard.

An image of the Bookmark screen.


2. The Bookmark is now available on the user's Dashboard for easy accessibility.

An image of the Bookmark screen.


3. The user can also navigate to Settings to manage their Dashboard. The user will have the ability to delete Bookmarks or Saved Searches from their Dashboard.
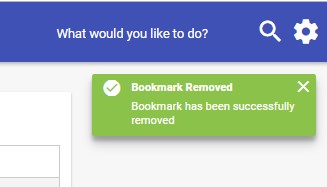
An image of the Bookmark screen.


An image of the Bookmark screen.


An image of the Bookmark screen.


Customizing an EDA User's Application Theme

Introduction

Learn how to personalize your EDA interface by changing themes and adjusting screen resolution to optimize individual user viewing experience.

Learning Objectives

By the end of this module, users will be able to:

  • Customize the EDA theme settings
  • Adjust screen resolution using browser zoom controls
  • Apply personalization features to EDA screens

Theme Customization Process

Follow these steps to customize the look of EDA:

  1. Log in to PIEE.
  2. Click the EDA icon.
  3. Click the Settings icon (gear wheel) located in the top right corner.
  4. Click Change Theme from the drop-down menu.
  5. Update theme preferences.
  6. Click Save or to keep default settings click the Reset to Default.

An image of the EDA Cog button.


An image of the EDA Theme Customization Screen.


Adjusting Screen Resolution

Follow these steps to update Zoom (screen resolution):

  1. From the browser menu bar, click the Settings and More icon (three dots) located in the top right corner.
  2. Click the Zoom minus (-) key.
  3. Screen resolution will update with each click of the minus (-) key.

An image of the Browser settings toolbar.


Tips & Best Practices

  • Adjust the theme settings based on your visual preferences and lighting conditions
  • Use screen personalization to organize the most frequently accessed information
  • If text appears too small, increase the zoom level instead of changing resolution settings